Previous setup
We went to Antwerp to take a look at their setup to have a better view of our project. When we arrived we saw a room with 2 chairs, 2 speakers and 4 toys.
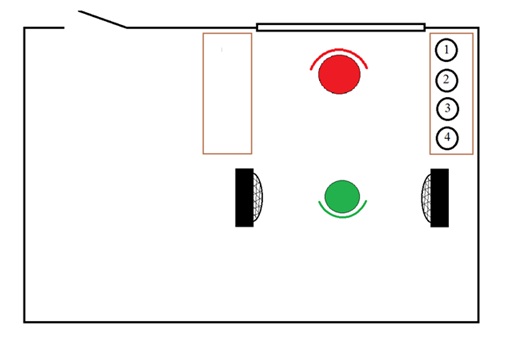
They explained us how they did the audiology tests. The observer sits in the red chair whereas the child or baby is positioned in the green chair. The speakers are positioned at the sides of the test person. When they do the tests they only test one side at the time. Then a person positioned behind the window puts the speakers on. When the child looks at the toys, the person in the red chair will discreetly push a button to activate a toy. Because of a lack of money they only have 4 toys that can be controlled at a distance. Beneath the red chair is a box with buttons to control the toys. These buttons aren't easy to access. Once one ear is tested the 4 toys need to be put at the other site to test the other ear.
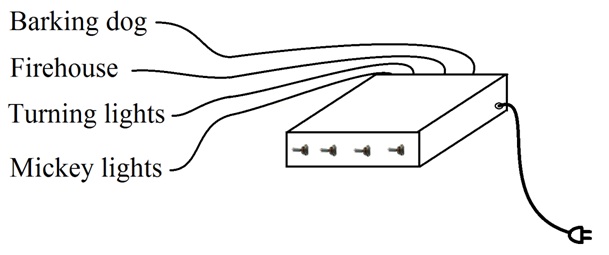
There is a button box underneath the observer's chair. The box contains converters to supply the toys. At the right side of the room there is a plug connection. So a wire runs from the right side of the room to the red chair. And from the red chair there are 4 wires that go to the toys. You see that there are a lot of wires on the ground that are cumbersome. Also other wires lay on the ground to run the tests.
Demands
To improve their reward system the audiology center had some demands. The things they want are:
- 8 toys
- Discrete foot pedal
- Possibility to deactivate toys
- Less wires on the floor
So they want 8 toys so they don't need to reposition the toys every time they change test side. The foot pedal is wanted so that the toys can be activated very easily and discretely. Because the current system has 4 switches the observer can chose which toy he activates. In the improved system only the foot pedal will be used to activate a toy. To be able to deactivate some toys we will need a button box where we can chose which toys we are going to activate randomly when the foot pedal is pressed.
New setup
In the new setup we will use 8 toys a foot pedal and a button box to select which toys we want to activate.
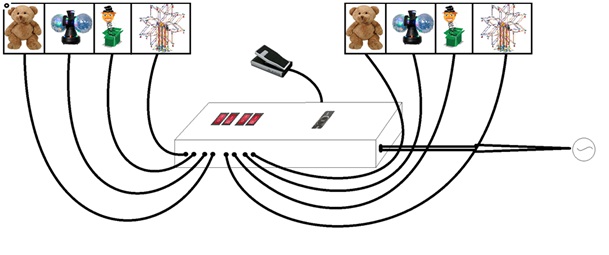
We see that in the new setup a lot of wires are used. One of the demands is that we reduce the number of wires. We will do this by putting all the wires, that go to the toys, in a bundle. The bundle will go to the back of the room behind the red chair against the wall. Once at the back the wires will be split into two bundles that go to the left and the rights side of the room. Once the wires are behind the toys each wire will go to the corresponding toy.
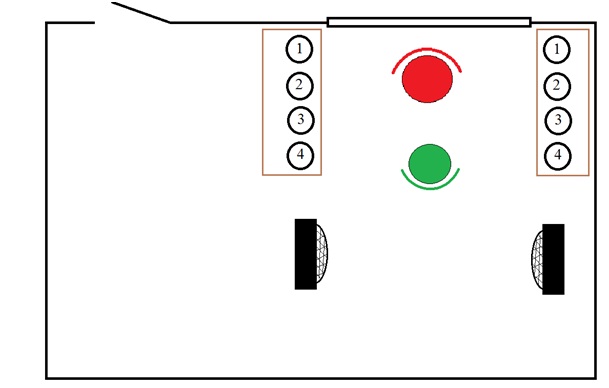
On the button box we see 5 switches. With the 4 red switches we can deactivate the toys we want and the other one is to choose the test side. So when we push on the foot pedal a toy will be activated. Depending on the position of the switches a toy at the left side or at the right side will be activated. The toys that are deactivated with the red switches will never play when pushed on the foot pedal.
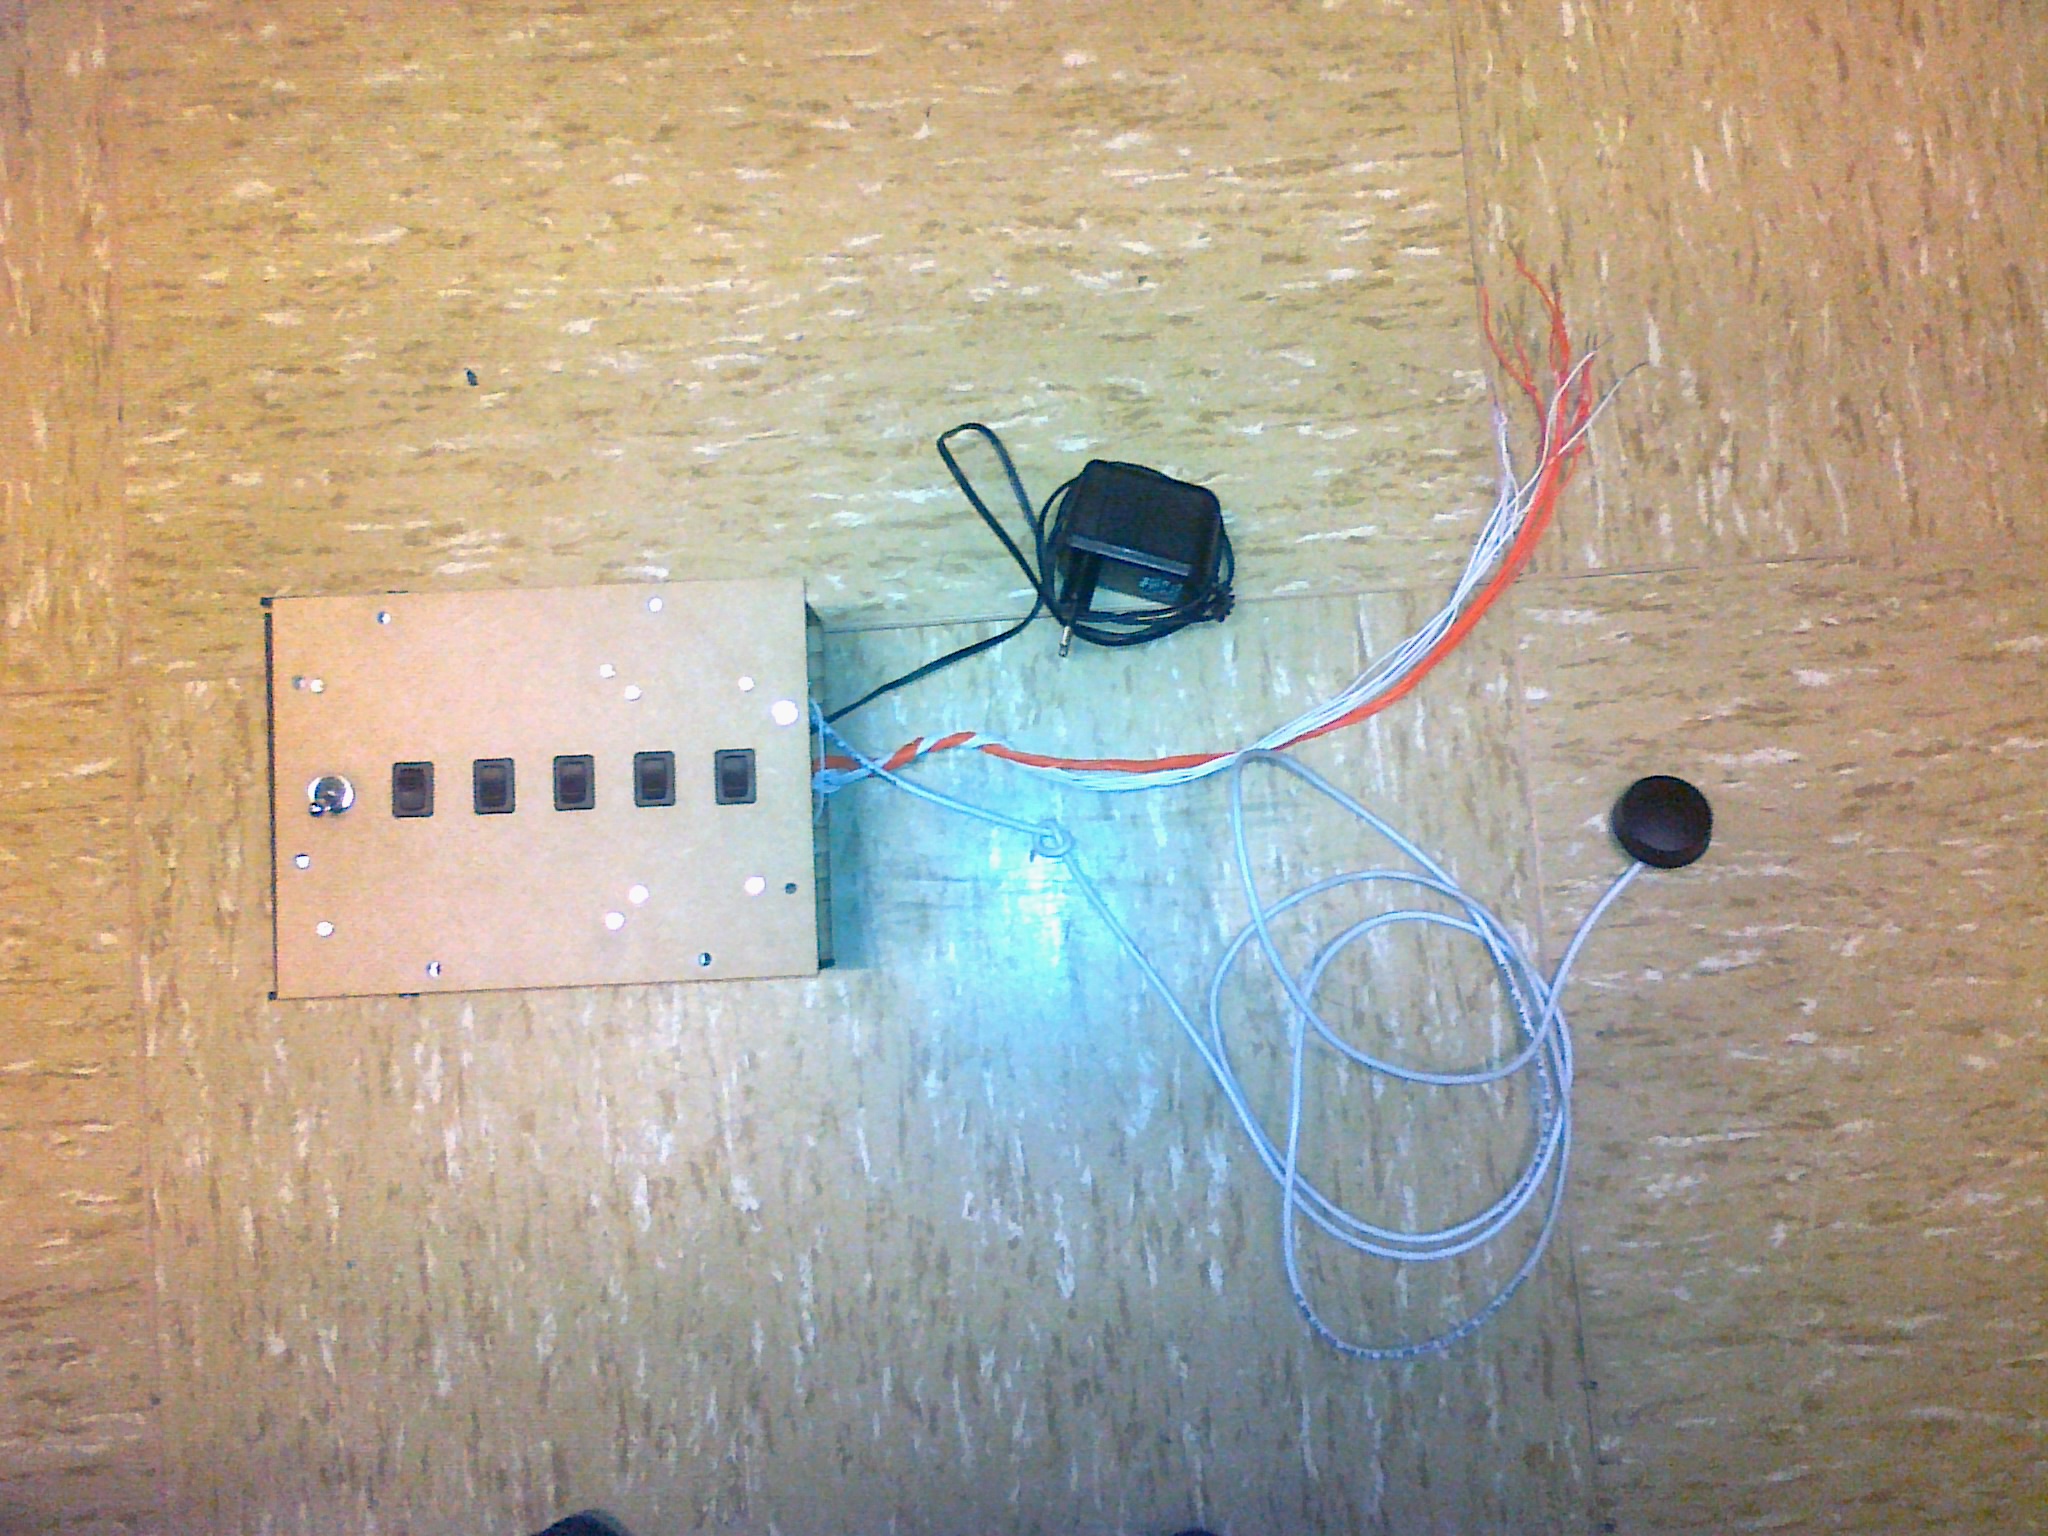
Switch box
The brown box with the black switches will be remoted by the person taking the test. The black adapter is the source. The white cable is the footpedal which allows to control the toys. The orange cables will be conected to the toys.