
The software is the important link between user interaction, sensors and motors. At the start-up the motors are activated and will go to a calibrated value, so the coils always start at the same neutral point. Furthermore the pins on the Arduino board are set to input or output state depending on their use and the LCD screen is activated. The software thus initializes the electronic components so they are ready for action. The user will then be asked by the LCD screen to adjust the level of difficulty of the exercises, the number of times he wants to push a button down during one exercise and which hand he wishes to train. This is done by adjusting 3 slide potentiometers in asked order and pushing the OK button. The adjusted parameters are passed on to the right functions within the code.
After the user inputted his or hers choice of exercise, the motors will be activated according to the level of difficulty and chosen hand. Depending on which hand was chosen, the motor adjusting the thumb level has to turn counterclock or clockwise. The motors adjusting the level for the fingers are independant of hand choice and depend only on the level of difficulty. Slide potentiometers are connected to the sliding parts, moved by the motors, that press in or relieve the coils in such a way that they slide along with them. Their variable voltage is read out by the Arduino board and is compared with the set value of the motors. If the voltage is the same as the set value, the motors will stop turning and the desired level of difficulty will be reached. Now the motors are initialized and the exercise can begin.
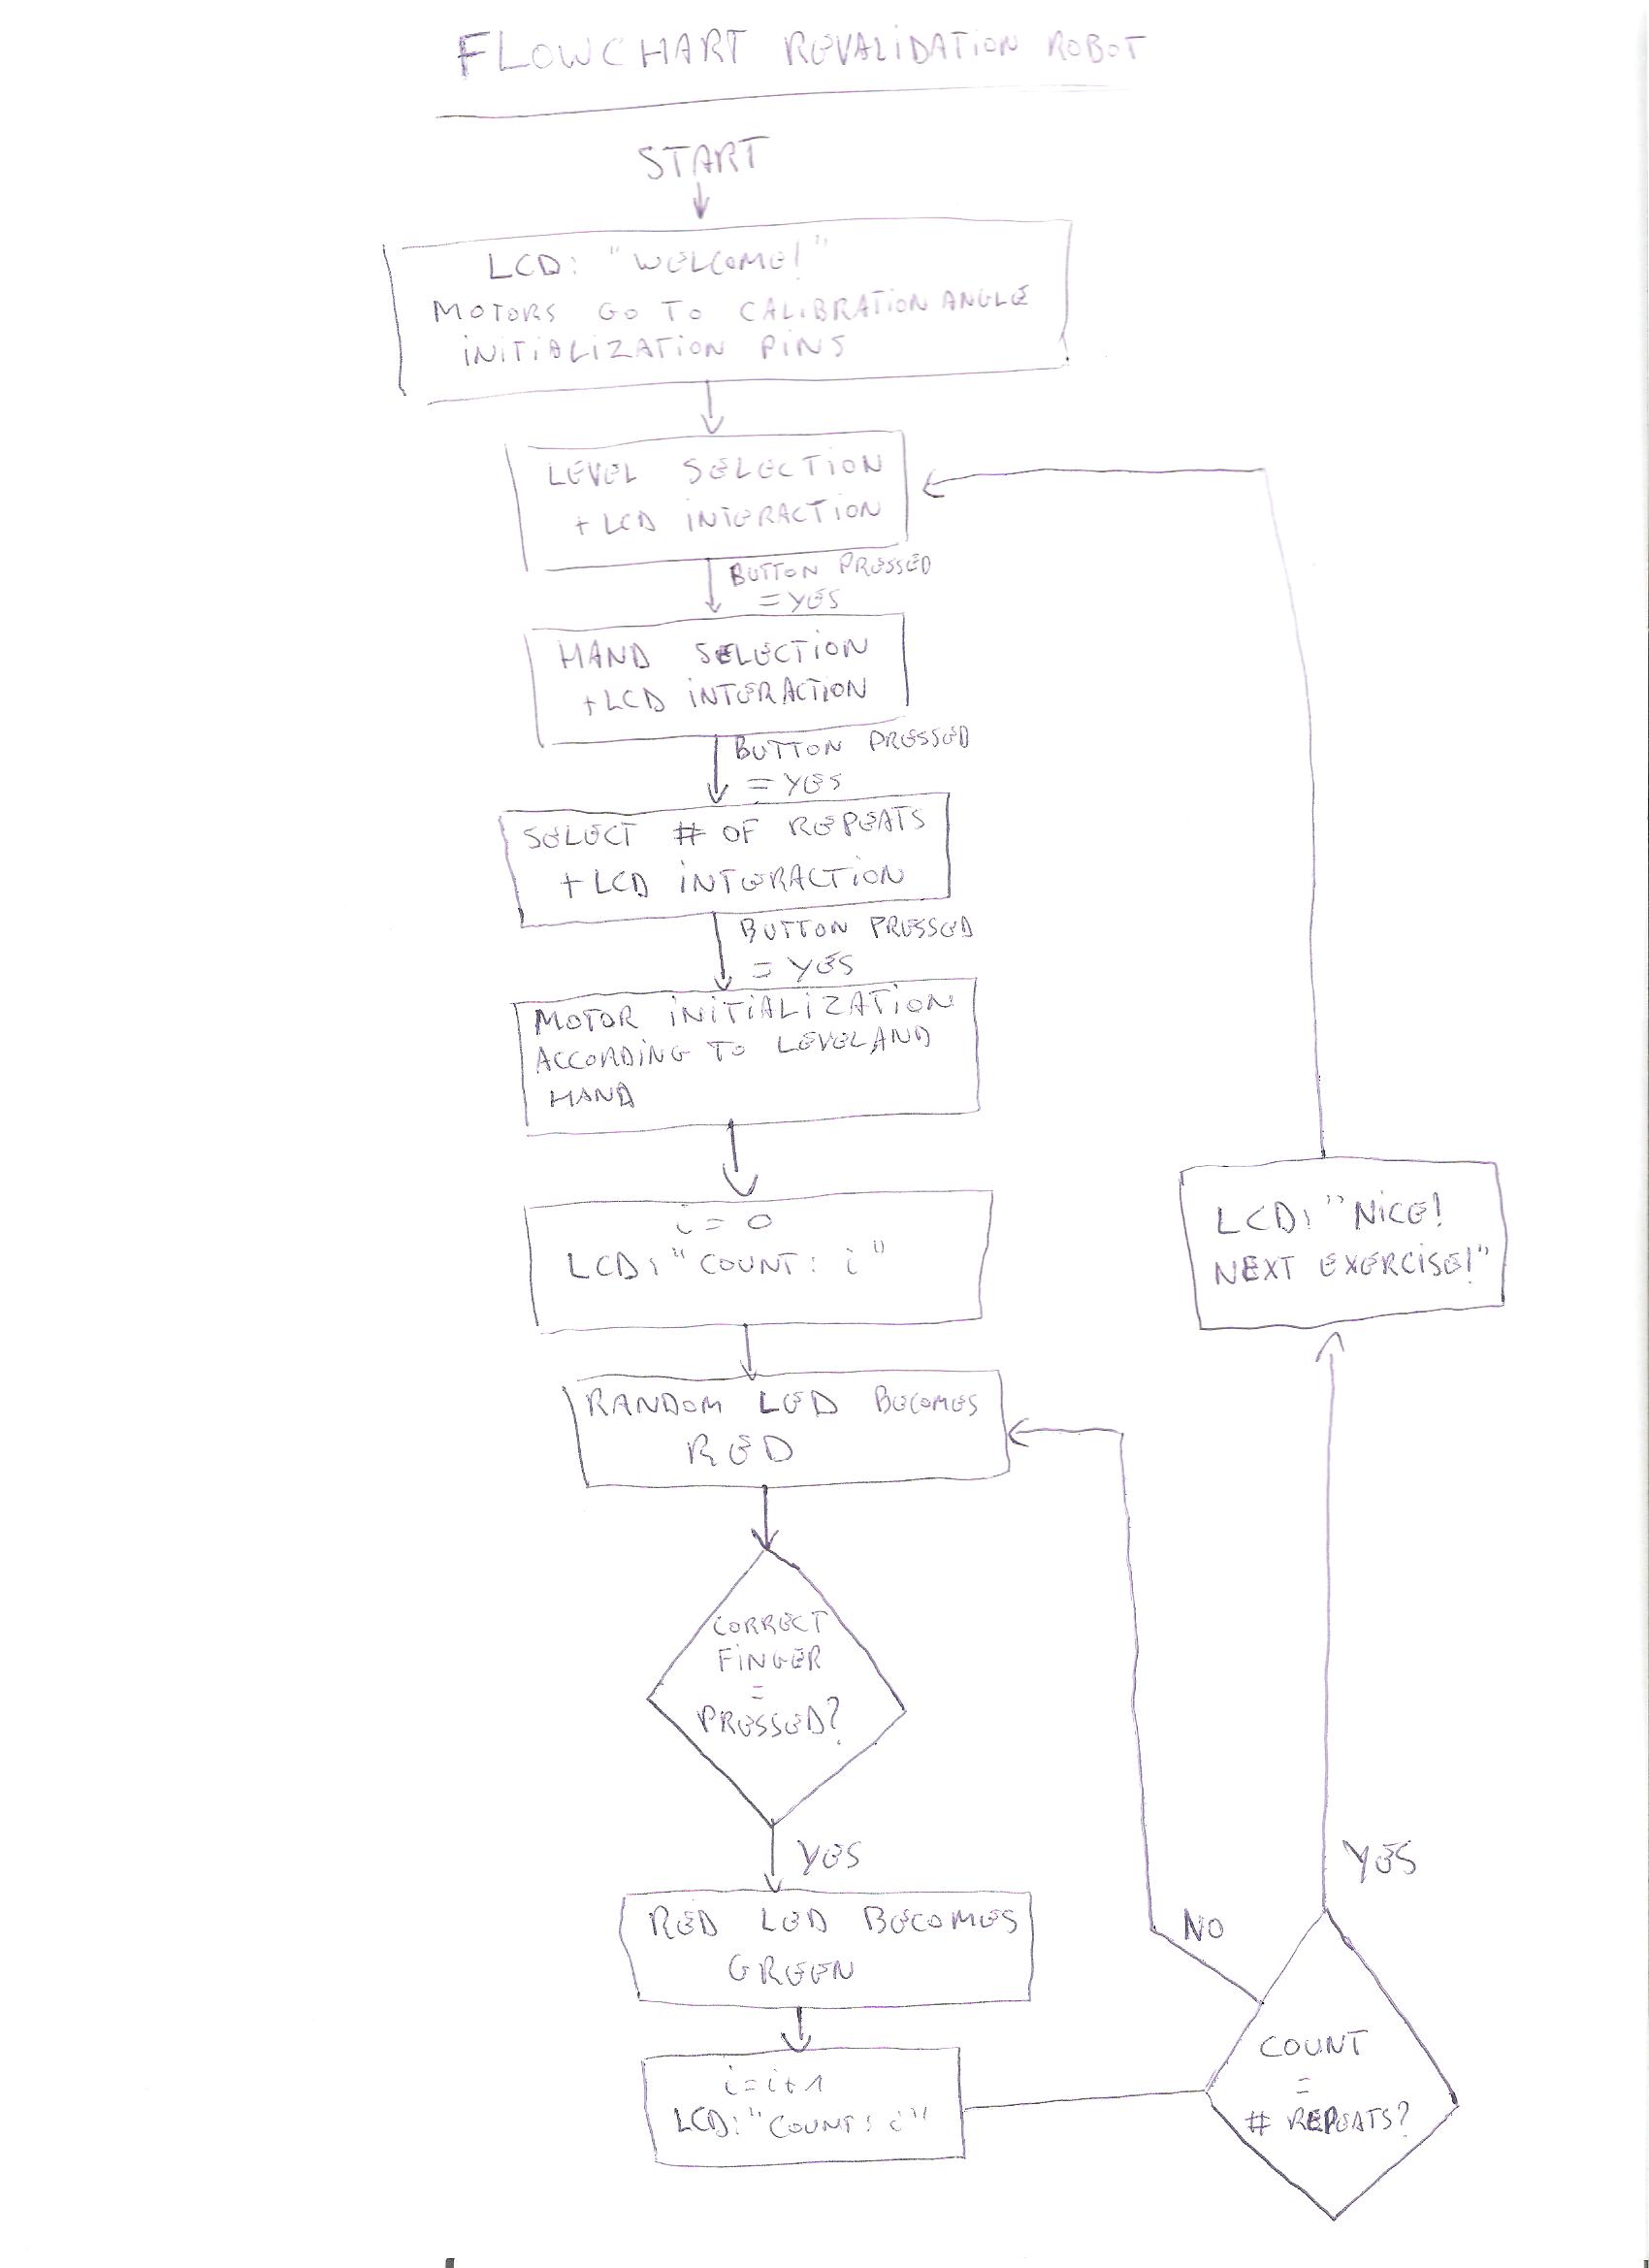
All LED lights, one for each finger/thumb, are lit green by default, but now the exercise has started, the software will randomly make one of the LED's turn red. This means the according finger has to be pressed to continue. A voltage divider, see electrical design, will have a different voltage at its mid-point depending on which finger is pressed correctly or wether anything is pressed at all. This voltage is read out by a pin on the Arduino board and used by the checkButton procedure in the software, so it knows when to continue. When the correct finger is pressed, the software will check if the number of repeats equals the number of repeats chosen by the user. If not, another LED will randomly turn red, meaning the according finger is the next in line to be pressed. The previous red light will return to its default green colour. If so, the LCD screen will compliment the user and the program will start again at choosing the exercise parameters. During the exercise the LCD screen will keep track of count and encourage the user. The flow chart displayed at the bottom of the page shows the different consecutive steps in the software. You might want to open the flow chart in a different tab/window with a left click option for better visibility.
The programming was done using a C++ environment freely available at the Arduino website. All libraries came with the environment, except the library containing the functions to work with a 3 wired LCD screen, this can be found as a extra downloadable file on the Arduino website. However, the function for printing numbers didn't work as wanted. Instead of printing the input number, it printed the according ASCII code, e.g. inputting the number 10 didn't display the number 10 on the LCD screen, but displayed an exlamation mark. This was fixed by using a simple function that converts a number to its ASCII value. Interested people can download the software code: