We acquired a Maxon BLDC with a modular design including an encoder and gearbox, but we decided to look for a still easier solution because of the needed supporting electronics for BLDC motors.
 While tweaking the servo to allow full rotation, we found that there was a tooth short when rotating continuously. This caused friction and wear, which eventually destroyed the whole gear and rendered the motor useless.
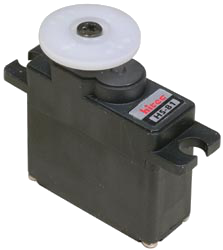
 This is also a servo but with a high torque of 8.23 kg.cm and a speed of 60 degrees in 0.19 seconds. With this overpowered servo we hoped to solve our engine and gear problems.
Like the other, this servo was also tweaked to become a multi-turn servo.
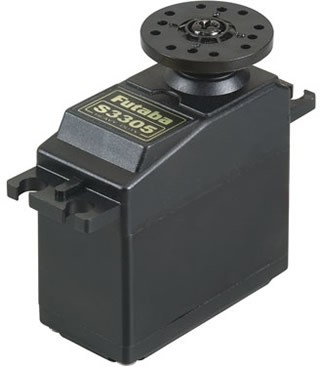
This is also a servo but with a high torque of 8.23 kg.cm and a speed of 60 degrees in 0.19 seconds. With this overpowered servo we hoped to solve our engine and gear problems.
Like the other, this servo was also tweaked to become a multi-turn servo.
The device used for interfacing with sensors, motors and everything else is the Arduino. This board incorporates 14 digital I/O pins (of which 6PWM) and 6 analog inputs. The processor in our Uno build is the ATmega328P.
Since the number of input, output and PWM pins is limited, special attention has to be paid to whether this is enough to interface with all equipment. Because we were planning on using 8 Hall sensors to track the hand position and an LCD (see further) also uses a lot of pins, we decided to play safe and use a multiplexer to save Arduino pins.
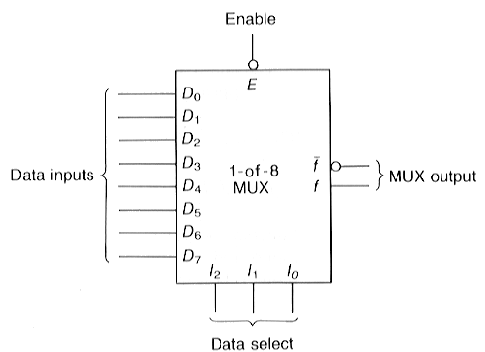 Multiplexing is the process of sending multiple signals over one line. In our case, the multiplexing is done by a dedicated chip. All signals arrive at the chip, which chooses the desired one. Of course, according to the amount of incoming signals, some select bits are necessary to tell the chip which signal to pass through. In the case of 8 Hall sensors and thus 8 or 23 signals, 3 select bits/pins are needed. This would still mean a reduction of 50%.
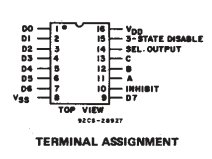 The above requirements are met, for example, by the CD4512BE, for which the pin assignment is shown to the left.
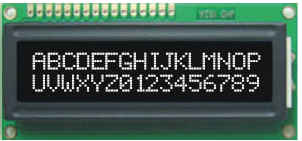
 For providing feedback, data and other info to the user, there is a whole set of LCDs available. The easiest would of course be to use one with a prewritten Arduino library to save coding time.
A well-known and well-documented screen is the HD44870 which is often used in copiers, laser printers and other equipment. We ordered a few for testing since they are rather cheap and small. The acquired screens have 16x2 characters and come both with and without blue backlighting.

The Hall sensors are require somewhat more specifications before ordering. There are a few factors wich have to be taken into account.
 In the catalog of for example RS Components you'll find several magnetic types listed for hall effect sensors: bipolar, omnipolar, unipolar and latches. The right type has to be chosen for our purpose. In our case we need to get a pulse when the hand/magnet passes a sensor. The sensor has to switch off the moment the magnet has passed. After consideration, we found that the unipolar kind was the best one to suit our needs.
The sensor obviously has to be supplied with a voltage we are able to provide. Luckily, most hall sensors have a wide supply voltage range, including 3.3V and 5V, which are the voltages readily available on the Arduino board. Since we will be feeding most of our equipment with 5V, we will do the same with the Hall sensors for simplicity.
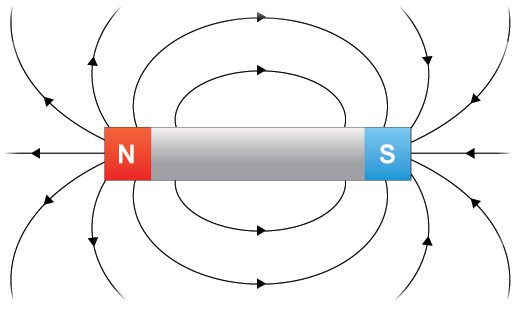
There are basically two major designs of Hall effect sensors, being the ones shown below.

Since we're aiming for a design with minimal dimensions, we're opting for the second type with the Vcc and ground supply on one side and the signal output on the other.
The linear potentiometer is a rather basic component. It has two times three identical connections: Vcc, ground and signal, where the signal returns a value between GND and Vcc in linear accordance to the position of the wiper.
We ordered our springs at Alcomex. We chose the tension spring type: T950 which has following specifications.
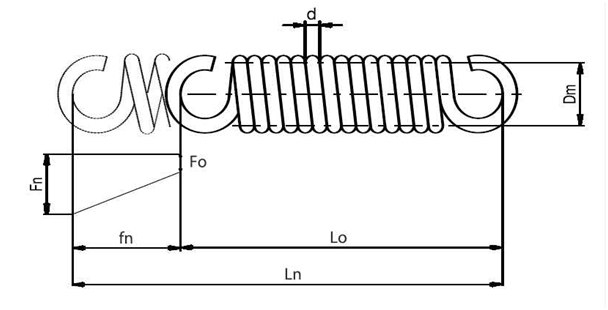
| dimension | value | unit |
|---|---|---|
| d | 1 | mm |
| Dm | 10 | mm |
| L0 | 55.4 | mm |
| fn | 99 | mm |
| Fn | 29.6 | N |
| c | 0.26 | N/mm |
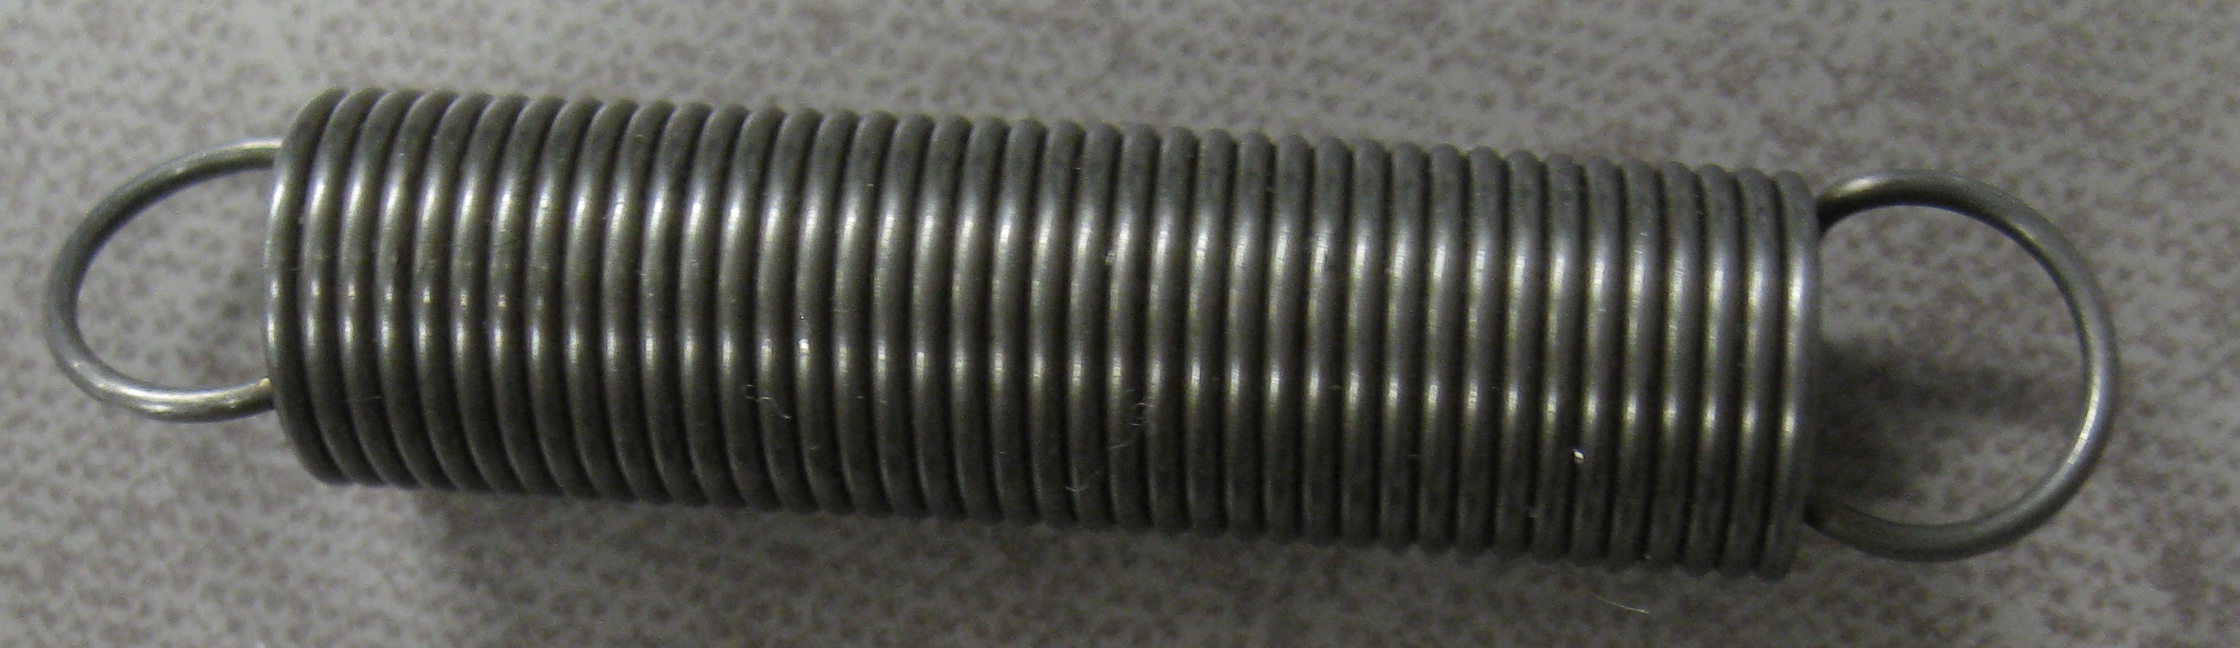 The choice was not that easy because the required forces are small and the elongation is large. Therefore, this is a very unique spring.
The springs are organized with 4 in parallel. The elongation the spring can achieve is about 10 cm, 5 cm for the pulling and 5 cm to put pretension on the springs.
The choice was not that easy because the required forces are small and the elongation is large. Therefore, this is a very unique spring.
The springs are organized with 4 in parallel. The elongation the spring can achieve is about 10 cm, 5 cm for the pulling and 5 cm to put pretension on the springs.
We then divided the 5cm to pretension in 20 levels. Every level you increase the harder it is for the person to pull his/her hand together.
|
Level
|
Pretension (cm)
|
Force start (N)
|
Force end (N)
|
Force start (N)
|
Force end (N) |
|---|---|---|---|---|---|
|
1
|
0,00
|
0,00
|
13,00
|
0,00
|
52,00
|
|
2
|
0,26
|
0,68
|
13,68
|
2,70
|
54,70
|
|
3
|
0,52
|
1,35
|
14,35
|
5,41
|
57,41
|
|
4
|
0,78
|
2,03
|
15,03
|
8,11
|
60,11
|
|
5
|
1,04
|
2,70
|
15,70
|
10,82
|
62,82
|
|
6
|
1,30
|
3,38
|
16,38
|
13,52
|
65,52
|
|
7
|
1,56
|
4,06
|
17,06
|
16,22
|
68,22
|
|
8
|
1,82
|
4,73
|
17,73
|
18,93
|
70,93
|
|
9
|
2,08
|
5,41
|
18,41
|
21,63
|
73,63
|
|
10
|
2,34
|
6,08
|
19,08
|
24,34
|
76,34
|
|
11
|
2,60
|
6,76
|
19,76
|
27,04
|
79,04
|
|
12
|
2,86
|
7,44
|
20,44
|
29,74
|
81,74
|
|
13
|
3,12
|
8,11
|
21,11
|
32,45
|
84,45
|
|
14
|
3,38
|
8,79
|
21,79
|
35,15
|
87,15
|
|
15
|
3,64
|
9,46
|
22,46
|
37,86
|
89,86
|
|
16
|
3,90
|
10,14
|
23,14
|
40,56
|
92,56
|
|
17
|
4,16
|
10,82
|
23,82
|
43,26
|
95,26
|
|
18
|
4,42
|
11,49
|
24,49
|
45,97
|
97,97
|
|
19
|
4,68
|
12,17
|
25,17
|
48,67
|
100,67
|
|
20
|
4,94
|
12,84
|
25,84
|
51,38
|
103,38
|
You can select each level from the above table to adjust the required force.
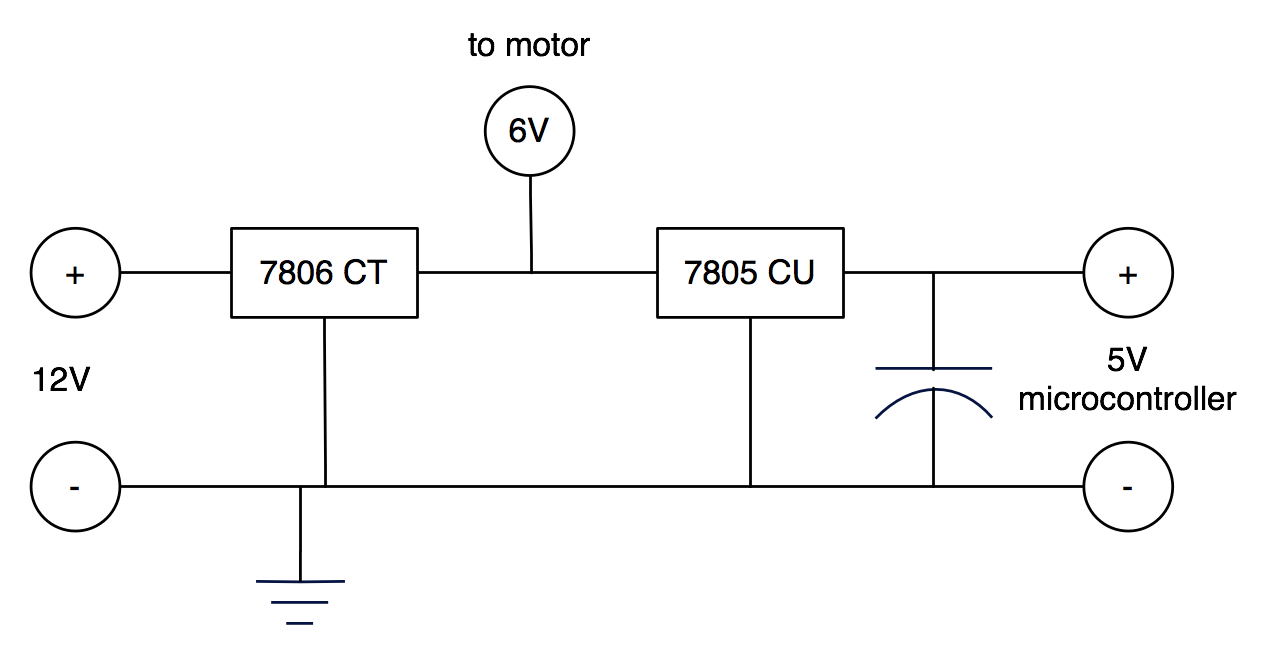
To power the Arduino and motor independent of a nearby computer, we designed a voltage regulator to provide the desired power. The electric scheme is as follows: